Sunday, May 22, 2011

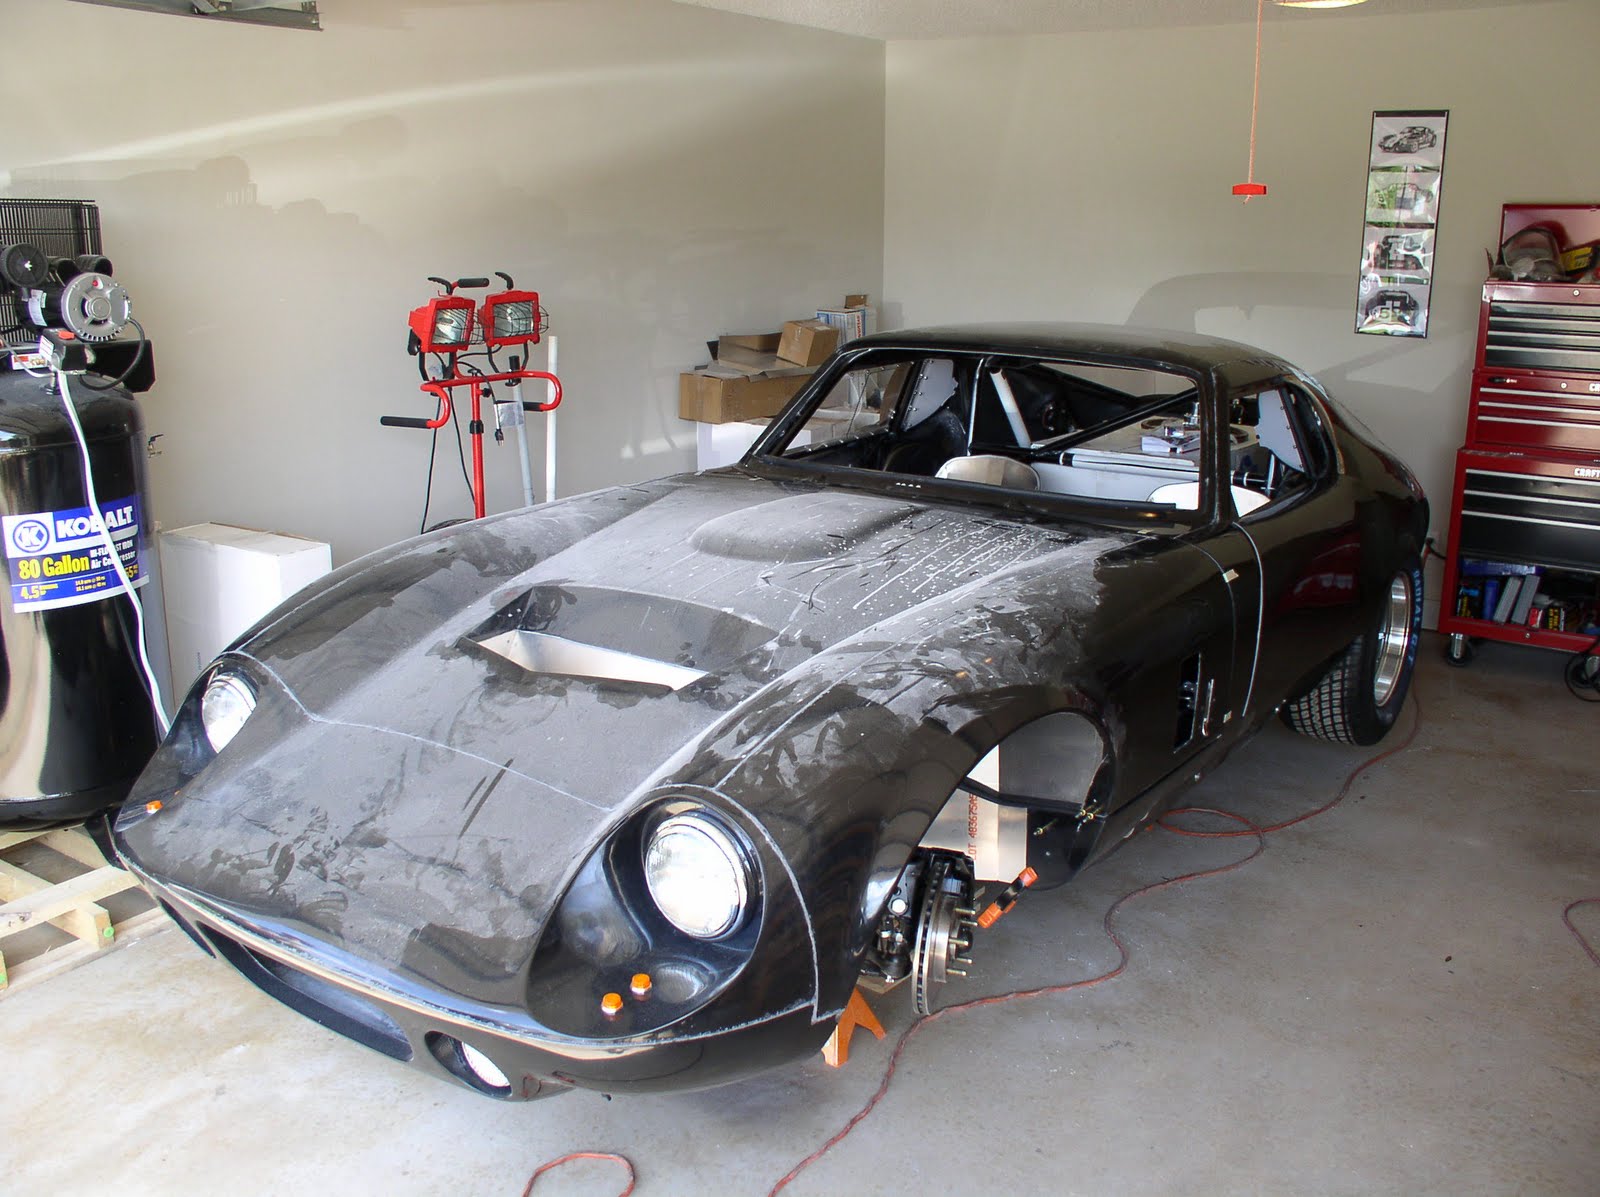
Our first bit of sanding!


First things first. Our battle with the driver's side exhaust pipes is not quite over. With all of the force we could muster, we were unable to make the final bend needed to line the exhaust pipes up with the headers pipes. The white pipe in the picture that's closer to the camer needs to bend just a little toward the bottom of the picture. Then we can rotate the pipes a little and slip them over the header pipes. It looks like I'll be taking this to a muffler shop (again).


We removed the last of the items attached to the hood, and marked and sanded both the hood scoop and the air inlet in the front bumper. They both look great now. We also cut the two openings near the latches to make them more uniform.


We've removed all of the windows, and drilled for wipers and side view mirrors. Next week, we'll get it back up on jackstands so we can re-attach the hood, tape up the chassis to try to keep the dust down inside the car, then we're ready to start sanding.


Body work will require several different products. We need to us a green High Strength Resin Filler to fix any problem areas. You saw us use this to reattach the bottoms of the hood. We will then use a product called Rage Gold to contour the body where it needs it. This includes areas where the doors meet the fenders, and any real low spots in the body. Next we will spray the car with a sprayable filler called SlickSand. This will be carefully sanded to get a nice level surface, otherwise you'll see high and low spots in the paint. We'll save the ingredient list for painting for another day.


Sunday, May 15, 2011

Exhaust(ing) Work


We worked this weekend to shorten the exhaust header pipes. We realized a few weeks ago that we would have to cut the header pipes to get the side pipes to sit where they are supposed to. We cut 1-3/4" of the pipes with a hacksaw blade meant for hardened steel. What a workout! The result for the passenger side was very nice.


The driver's side is fighting us as one of the two header pipes is not quite pointed the way we need it. Of course, no one sells a 1-7/8" diameter dowel so we're going to have to mill down a 2" diameter dowel to fit in the header pipe. Once we've done that, we'll pull the top pipe on the driver's side out and down a little.

In the next few weeks you will see some dramatic changes. We removed the hood this afternoon in preparation for adding some supports for the splash guards, for adding some filler to the bottom of the hood where you can see light through the fiberglass, and for covering the underside of the hood in truck bed liner. Then we'll re-install the hood, remove all of the other exterior components (lights, windows, etc) and break out the sandpaper and filler.


At a very high level, we'll be doing the body work next, followed by removal of the body for paint. While the body is off, we'll be finishing the installation of some items on the chassis that are easier to get to without the body. Then we'll put it all back together. I hope to have this all done by September, but if the summer is very warm I might push that back about 60 days.

Saturday, May 7, 2011

Long Couple of Weeks

It's been an eventful 2 weeks, with very little progress on the Coupe as a result. Between severe weather, painting a couple rooms of the house, and other items we have spent very little time in the garage.

We did fit the rear hatch. I didn't take a picture, but we have trimmed it for a preliminary fit and have attached it to the metal frame. We will pull it out again for a final fit once the car is painted.

We also discovered the car had settled to an inch lower than the already-low 4 inches of ground clearance in front (4.5" in back). We put the car back on jackstance and made the adjustments, but this will throw off the alignment we recently did. D'oh!

While the car was on jack stands we tried fitting the side pipes. We discovered that the exhaust headers need to be trimmed about 1/5 inches on both sides of the car. We don't have room to trim them easily with the body in place, so we'll tackle that when we have the body off.

We've documented a punch list of items to work on before we start on the body work. We need to attach the mirrors. We also need to drill holes in the cowl for the windshield wiper mounts. We'll probably tackle a few other items as well, then cover everything under the body with plastic and get out the sandpaper. We should be starting on the body work by early June!

Sunday, April 24, 2011

Easter Joyride!!


Come along for an Easter Joyride in the Coupe! We took a few spins around the neighborhood and two very short runs out onto the main road. The wind noise is high because we do not have the windshield in place: video


We wired the headlights and front turn signals this week.


We also wired the reverse light (in the license plate frame) and the license plate illumination lamp.


We were working on the rear hatch plexiglass when we ran out of time. Maybe we'll have pics of that next week. 'Til then!

Monday, April 18, 2011

Lots of Little Things There's no point in taking pictures of things you can't really see. This week we decided that we'd had enough of the brake master cylinder we bought last summer. Try as we might, it appears that the remanufactured cylinder wasn't going to pressurize brake fluid so that we could bleed it. With a new master cylinder installed, the brakes now feel great, but we gave up much of Saturday to get this done. We pulled the fuel injectors and shipped them off to a vendor who cleans and rebuilds them. With the top of the engine off to get to the injectors, we took the opportunity to burp the engine of some air that was preventing the radiator fan switch from coming on. We also snugged up a line that weeps a little coolant when the engine is warm. We secured wires under the hood and in the passenger footwell. We installed the shift knob and charged the battery in anticipation of a test drive when the fuel injectors return this week. We tried to install the exhaust pipes, and learned that the side pipes need to be stretched a little to fit over the exhaust headers. Off to the muffler shop! We're down to a short list of things that need to be installed before we start on the body work. Anything that requires holes to be drilled in the body will need to be temporarily installed before we start sanding and painting. These include wipers, rear hatch, spoiler, exhaust, headlight covers and side mirrors. We're getting close!

Sunday, April 10, 2011

Two Scoops!


Lots of pictures this week. Remember, you can click on a picture to get a better look.

We decided to use the rear window scoops after all. On the original cars, these fed a rear brake cooling duct. On our car, they will scoop fresh air in through our opening scoop windows to cool us off on mild days. When it gets hot, the windows will close and we'll run the air conditioner!


We were not pleased with the mount on the hood for the hood struts. These keep the hood open when it is raised, and the hood side of the strut was mounted to some styrofoam board with fiberglassed mat over it. The problem is, they didn't put enough fiberglass on it. You can actually see the styrofoam in this picture. We added an aluminum piece with three extra mounting bolts to really hold it well.


We finished installing the bottoms of the hood. These are needed to provide for a locating pin and hole (the hole is just visible on the left edge of this picture). The pin is an acorn nut installed on the body where the hood settles on. We also marked and trimmed where the hood meets the cowl one last time to get a nice consistent gap. Those large aluminum pieces hanging from the hood are the upper splash guards that you saw last week with the hood closed.


As promised, here is a pic of the installed seats. They're not much to look at without the upholstery, but that is staying in a sealed bag until the painting is all finished. The seats do face away from the centerline of the car a little, but they're in just the right place!


We drilled the dash supports and installed the dashboard. We also drilled some holes to hold the switch panel in place. Picture those surfaces covered in a pebbly black truck bed liner, as that's the plan.


One final picture to hold you over until next week. Thanks for checking in!

Sunday, April 3, 2011

Another Good Week!


We set our sights on some more noticeable changes this week. We assembled and installed the headlights and front turn signals.


The upper splash guards provided with the kits are a couple of inches too small to actually seal off the engine compartment. A local metal shop bent some oversize pieces of aluminum, and with a bunch of marking and cutting we were able to come up with pieces that fit!


Under the car, a long narrow piece of aluminum connects two triangular sections that help funnel air into the radiator when it comes through the opening in the front bumper. That strip of aluminum looks like it'll flap in the wind, so we came up with an idea to tie it to a more solid piece of aluminum a few inches behind it. No one will ever see it, but we're happy with the improvement.


We dropped the windshield on just to make sure we hadn't distorted the body along the way somewhere. When the time comes, we will have it professionally installed. Interestingly, the windshield shape comes from a 1986 Jaguar XJS. I wonder how many windshields they had to look at to find that one? :-)


We won't have pictures until next week, but we also installed the seats and started the process of fiberglassing the bottom edge of the hood back on. We had cut it off earlier to size the hood correctly. It's our first effort with fiberglass, but so far it is going well.


In the coming weeks, we will be winding up construction. We need to fit the exhaust pipes, install the rear hatch, drill for the windshield wipers, fit the spoiler, and install the mirrors.


We will then have a punch list of things to go back and address before we start smoothing out the body itself. With any luck, we'll be painted and on the road by September.