Sunday, September 26, 2010

ENGINE + TRANSMISSION = ONE LONG WEEKEND!
This weekend we pulled together all of the new parts we purchased to refurbish the clutch. Everything between the engine and the transmission is new: starter, block off plate, pilot bearing, flywheel, clutch plate, pressure plate, release bearing, and clutch fork.

We remounted the old exhaust headers so we could attach the engine hangers. We removed the engine from the engine stand and started adding cutch parts. Except for a hammer-smashed thumb (mine), this went smoothly. Next it was time to lift the 50+ pound transmission and hold it with millimeter precision while pushing it through all of the clutch parts towards the engine. It was as hard as it sounds, but it is done!

We also completed the modifications to the firewall needed to install the air conditioner. I didn't take a picture of it before tearing it back down, but you can see the hole created in the firewall anticipating the re-install once the engine is in.

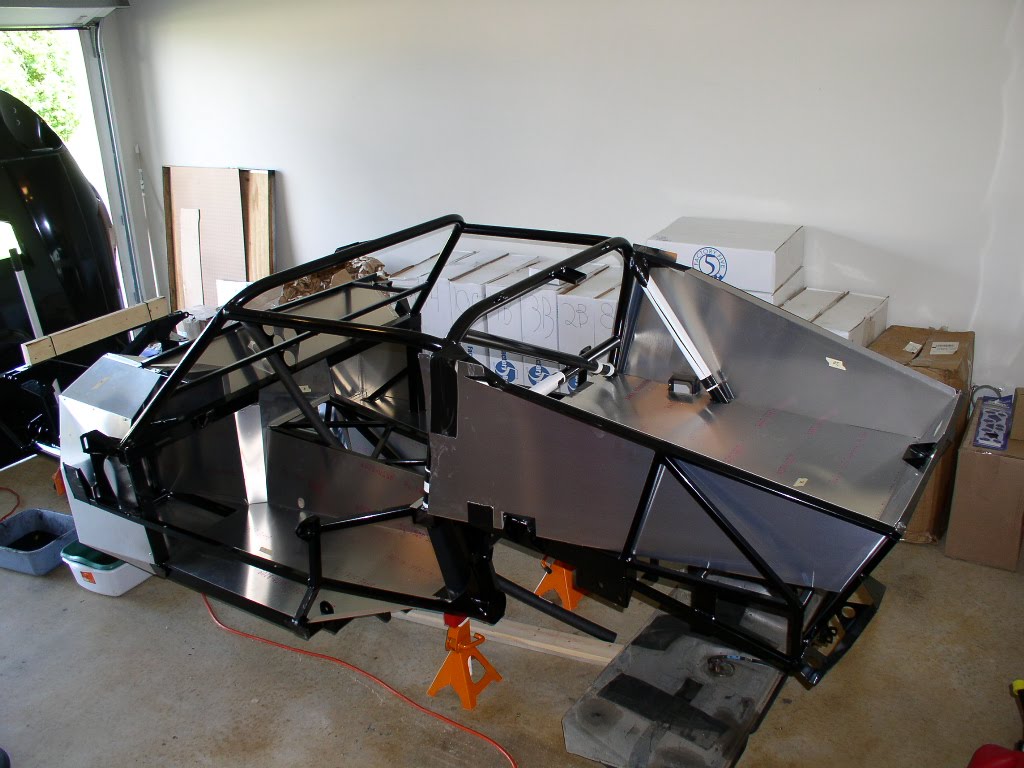
One last shot of the kit for this week. We continue pulling pieces out of boxes and bolting them on. It's only a matter of time before we run out of boxes! Til next time...

Monday, September 20, 2010

Lots of Little Things This Week

We tackled a ton of little things this week as we draw ever closer to installing the engine. We installed the new air conditioning compressor with its custom bracket. We also installed several replacement wheel studs as the originals were damaged.
The brake master cylinder was installed. We'are awaiting a "final answer" on the proper way to plumb the brake lines before we connect all of the lines. At that point, we'll be able to bleed the brakes! Speaking of brakes, I finally figured out how to attach the flexible rear brake lines. We bought parts for the '93 Mustang that are new, but I needed to figure out how to attach them to the axle itself. We cut the bracket a bit and drilled a hole in the axle bracket; now it looks like it belongs there!


We installed the back of the transmission tunnel cover and fitted the cockpit rear wall.

Our wheels are another week or two away. Otherwise, the only part we're still waiting for is the radiator! We ended the day Sunday fitting and cutting the firewall to accomodate the air conditioning system. This week we have to find some aluminum and figure out how to bend it to create a "bump out" for the firewall.
We are also pursuing a few parts: grippy brake pads since our car won't have power brakes, one last brake line connector, and an intake manifold bolt that I broke weeks ago.
Once the air conditioning systen is installed in the firewall AND we receive the wheels, we can put the engine in the car. The engine install is probably 3 weeks away. Til next time...


Monday, September 13, 2010

Field Research

A well-known engine tuner for kit cars lives about 200 miles away, and Saturday he held an annual "Dyno Day", inviting people to his shop to test their car's performance on a dynamometer. We decided to go, hoping we could get some pictures of the little details of these kits that aren't mentioned in the assembly manual.

What we got was SO MUCH MORE! While the only kit cars on the premises belonged to our host, one of those cars was a real monster. With a V-8 engine fed by two turbochargers AND a supercharger, this car has over 700 horsepower measured at the rear wheels. He painted it the very same colors we plan to use for our Coupe, and my assistant builder got a real treat when he went for a ride in it!


Our host was very generous, providing lunch for all attendees and even a t-shirt. As we talked at lunch, it became obvious why there were no kit cars driven by any of us to the event. It turns out we ALL have cars at home that are partially-built. Hopefully, next year at least some of us will have something finished that we can bring with us.

We did manage to get some work accomplished this week on our Coupe. We added the passenger footbox, found a way to mount the rear brakelines on the axle, and started sorting the dozens of little pieces of aluminum that will round out this car later.

Monday, September 6, 2010

Rollin' Along!

With a nice long weekend, we made some great progress! We have the front suspension mounted. With fully adjustable upper control arms, this is probably the most "race car" part of the car.


On a roll, we grabbed the rear suspension and installed it as well. We did some head scratching while we sorted out what fastener went where. The mix of donor and new parts coupled with a kit that is supposed to work with many model years of donor makes for fasteners that sometimes don't quite fit.


With all four corners on the car, we could mount the wheels and tires and push it around the garage. Problem is, the wheels are still 3 weeks from arriving here.


The work didn't stop there. We mounted the fuel tank and finished running fuel lines to it. We mounted the pedals. We also temporarily mounted some of the aluminum panels removed a few weeks ago so we could drill holes in preparation for riveting it together. We removed the windshield and rear window and cleaned the duct tape goop off of the body.

Next week you should see some aluminum panels mounted back on the car. We're painting the outside of the panels with truck bed liner to give it a tough, matte black finish.

It's interesting how much research we have to do during our "down time" to prepare for the next steps. We look for photographs of other cars that have been built and consult with fellow builders in an online forum. The fourteen year old pushes me to spend time in the garage, so we must be doing something right!

Sunday, August 29, 2010

Reading the Instructions

This week we actually started working through the Assembly Manual itself. Until now all we've done is preparatory work, so it was nice to attach some things to the car.

We started by removing all of the aluminum pieces that came on the car. We took lots of pictures so we can figure out how to put them back in later.

The first steps in assembly were to bend brake lines around some of the frame from the rear axle all the way to the front wheels. It took a few tries to get it right, but we eventually made pieces that fit and got them riveted in place on the chassis. We also ran some fuel lines under the passenger side of the car. Those really tall lines sticking up in the engine bay are in preparation for running fuel lines to the engine later.

We also received the valve covers we ordered, so we put those on. They look nice without being too shiny.

Speaking of shiny, as we conducted a full inventory last week of every nut and bolt we did take pictures of a few parts. Here are the guages for the dash, our seatbelts (a real racing harness!), and the fuel filler cap. The filler cap has a spring-loaded opening mechanism that was invented by endurance racers to speed up fuel stops. Ours has a real fuel cap hidden underneath, but the chrome cap replicates the original look.


This evening, we installed much of the front suspension. It was too dark for pictures, so you'll have to wait until next week!

Sunday, August 22, 2010

Big changes this week!

After finishing as much of the engine as we could (we are waiting on new valve covers to arrive) we turned our attention to cleaning the transmission. It was the last messy job we have until we get to the bodywork many months from now.

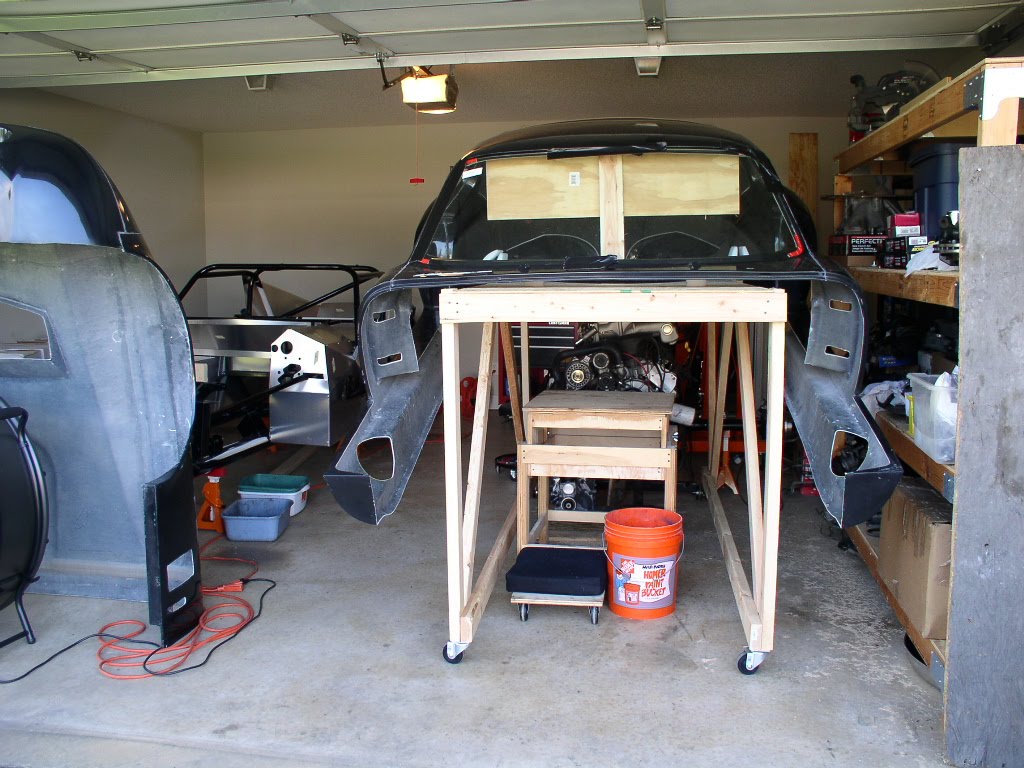
With all of the donor parts clean, it was time to build a buck to store the body. I had a plan, and we almost stuck to that plan. We reached our goal, though which was to safely store the body with enough support to prevent it sagging or warping in the hot sun while allowing us to use the space under the body to store parts, etc. Here is the result.

With the body off, we set about identifying, labelling and photographing the relationship between the 20 aluminum panels that were bolted to the chassis when it arrived. All of these panels have to be removed so we can run brake lines, fuel lines and a few other things. Eventually, all of these panels will be riveted back into place. We have a box of aditional aluminum panels to rivet on as well. The kit came with 1200 rivets for a reason, I guess.

Tuesday, August 17, 2010

ENGINE WORK


We labelled and removed just about everything from the donor engine. As you can see it started out pretty dirty.


We added a couple of upgrades to give it a little more power and are almost done putting it back together.